Motorcycle LED Technical Blog by Custom LED

4-Way / Hazard Blink Problem on Motorcycles with LED Turn Signals

What the Heck is the 4-Way Blink Problem?

Some motorcycles exhibit strange behavior on the blinkers when switching out from Incandescent to LED blinker lamps.  You may experience what we call the 4-Way Blink Problem, where all turn signals on the motorcycle blink simultaneously - regardless of the direction you choose on the handlebar turn signal selector switch!  Basically, the blinkers behave like hazards anytime you try to use them.

What Causes the 4-Way Blink Problem?

This problem actually has nothing to do with the flasher relay on the motorcycle.  A flasher relay can not cause, or fix this particular issue.

The problem stems from a lack of restive load (incandescent bulbs) on a blinker system that was designed for incandescent bulbs - however the best solution is actually NOT to add resistors.  It is actually best to solve the problem at the source, which is the turn signal indicator lamp in the gauge cluster.  The turn signal indicator lamp is the little light that blinks next to the speedometer when you are turning. 

It is at the turn signal indicator lamp where both the left and right turn signal circuits are brought together.  Left turn circuit on one side of the indicator lamp "filament" and right turn circuit on the other side.  With the incandescent turn signal bulbs installed, the system behaves as designed where voltage on either the left or right turn signal circuits illuminates the turn signal indicator lamp.  This is achieved simply by allowing the opposite side turn signal circuit from the one activated, to function as a ground path for the indicator lamp.  The small amount of current that passes through the indicator lamp in the gauge cluster is not enough to illuminate the power-hungry incandescent bulbs, and they simply function as a ground path without lighting up at all.  When removing these incandescent bulbs and installing LEDs, you have removed this ground path - which usually leaves the turn signal indicator lamp inoperative - AND you have introduced voltage to the opposite side turn signal circuit which is enough to illuminate the super efficient LEDs.

OK, So How Do I Fix the 4-Way Blink Problem?

The pure solution to the 4-Way Blink Problem (not the simple one, but the correct solution) is to diode isolate the two turn signal circuits leading to the gauge cluster, and provide a dedicated ground for the indicator lamp.

This is done by finding these two turn signal circuit wires leading into the gauge cluster (typically the same wire colors as found at the blinker lamps themselves).  Once you properly identify them in the harness leading to the gauge cluster, you cut them and install a Diode (1N4001) in each circuit (with the gray band towards the gauge cluster) on the two wires feeding power from the turn signal circuit. You will then combine the outputs of the diodes into one of the two wires leading into the gauge cluster, and ground the other wire going into the gauge cluster.

The diodes will keep electricity from being able to cross over from one turn signal circuit to the other, but it will allow the two circuits to be combined to power the indicator lamp properly.

The following crude sketch illustrates the concept.

The 1N4001 diodes can be purchased from our website here. You will need 2 diodes for a proper install.

Dude, You Lost Me!

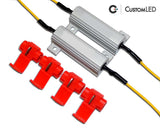
If installing the diodes seems too involved for you, don't despair, there is another solution. The simplest way to fix this problem is to add some resistive load to your blinker system to damp out these crossover voltages and restore the ground path for the indicator lamp. One pair of our Stage I Load Equalizers may sufficient to solve this problem on some modern sportbikes, however most bikes do require more than one pair, or larger Load Equalizers altogether. Older bikes require as much as 25 Watts to be dissipated through a resistor to eliminate this problem! 

I'm afraid it will take a little experimentation to get the right amount of load.  But, if installing one pair of the OEM blinkers back on the motorcycle eliminates the 4-way blink problem, then you can be sure that an equally sized Load Equalizer will do the same (match the wattage of the original incandescent bulb, to that of our Load Equalizer).

By Custom LED | | 1N4001, 4-Way Blink Problem, Diode Fix | Read more

All about LED Load Equalizers for LED Blinkers on Motorcycles

You may have heard the term "Load Equalizer" or "Load Resistor" being thrown around when looking for a solution to your fast-blink or no-blink issues on your motorcycle.  The fast blink issue occurs when you remove the OEM incandescent blinker lamps and replace them with LEDs.  

Well, understanding what a Load Equalizer is, starts by understanding why you need one in the first place.

Why do I need a Load Equalizer?

If you remove any of the OEM blinker lamps on a car, truck or motorcycle, you may find that your blinkers now blink faster than they did originally - or they stop blinking entirely!  The Fast-Blink rate is actually the designed response of the OEM flasher relay.  It's designed to blink fast when the Flasher Relay detects that a light bulb is burned out.  This way, the operator knows he has a light bulb that needs to be replaced.  

The Flasher Relay makes this burned-out-bulb determination by checking the amount of current being drawn through the Flasher Relay to power the blinker lamps.  When using LEDs blinker lamps, there is FAR less current being drawn on the blinker circuits compared to the OEM incandescent bulbs.  It is because the LEDs are so efficient that they draw such little power.

What the heck is a Load Equalizer? 

A Load Equalizer is used as a power-sink, to dissipate the same amount of power as the OEM turn signal lamps did.  

This means, if you had 25 Watt light bulbs originally on your turn signal circuit, you need to add 25 Watts worth of Load Equalization to create the same power draw on the blinker circuit as with the OEM lamps installed.

If you match the power draw properly, your Flasher Relay is tricked into thinking the bulbs are still there!  And like magic, it starts blinking normally again!

Where do I get the Correct Load Equalizer for my application?

What you need to do is find out the wattage of the OEM blinker lamps that you have removed or replaced with LEDs.  You will need to add this amount Wattage with Load Equalizers.

Custom LED makes the finest Load Equalizers for motorcycle applications.  They do not get dangerously hot like some other cheaper alternatives out there, and we have been making them since 2001!  Tried and true is the way to go.

What about replacing my Flasher Relay instead?

YES!  Replacing your Flasher is the best way to fix fast-blink or no-blink issues.  If we have an LED Flasher Relay that will work for your application, then forget about Load Equalizers.

By changing the OEM Flasher Relay to one that does not have a bulb-out notification, and is designed to work with very low current draw, you are taking advantage of the power-saving aspects of LED blinkers!  

Why put the large electrical load of the incandescent lamps back on your blinker system just to trick the OEM Flasher Relay, when you can just replace the OEM Flasher Relay with an Electronic LED Flasher Relay that blinks normal regardless of what blinker lamps you are using?

Custom LED makes a few different types of Electronic LED Flasher Relays for Motorcycles.  See which one is compatible with your bike on the respective product pages.


If you have any technical questions about your particular application, please don't hesitate to contact us!

By Custom LED | | Flasher Relay, Load Equalizer | Read more

CBR 600RR Flasher Relay Replacement for LED, Years 2003, 2004, 2005, 2006

So, you may be wondering where the flasher relay is on your 2003-2006 Honda CBR 600RR.  You have changed your OEM blinker lamps to LEDs and/or installed our 2003-2006 CBR 600RR Blaster-X Tail Light on the rear, and now the blinkers blink fast, or don’t blink at all.  You know you need to replace the flasher relay, but nobody seems to have one compatible with your bike!

Worry not, Custom LED has the answer, and the solution!

The flasher relay on your bike is physically built into the gauge cluster.  “Replacing” it requires disconnecting two particular wires leading to the gauge cluster, and connecting the Custom LED ELFR-1 LED Flasher Relay to these wires.  A very useful and informative 2003-2006 CBR 600RR ELFR-1 Flasher Relay Install YouTube video clearly shows an approach that does not require any wires to be cut!

There are two specific wires leading to the gauge cluster (the gauge cluster is the device that shows speed, engine RPM and other indications) that you will need to identify for a proper installation of our ELFR-1.

  • Gray wire = "blinks" +12V with the blinkers on, this is your Load wire coming from the stock relay
  • White/Green stripe = ignition switched +12V power

You should check these wire functions with a volt-meter or test light before proceeding to make sure they match the functions listed above.  The motorcycle manufacturers can change wire colors slightly from year to year, and region to region.

If the wire functions match those listed above, then proceed as follows.  You will need to effectively disconnect both wires from the gauge cluster, and connect them to the ELFR-1 as follows:

  • Gray wire gets attached to the BLACK wire on the ELFR-1 (attach to the wire going away from the gauge cluster, not to the gauge cluster)
  • White/Green stripe connects to the RED wire on the ELFR-1 (attach to the wire going away from the gauge cluster, not to the gauge cluster)

NOTE: It is critical that you effectively disconnect these wires from the gauge cluster, otherwise the OEM relay will still control the blinkers and cause the malfunction you are experiencing to continue.

This Hard-Wire installation is somewhat tricky if you are not familiar with electronics, and for this reason we generally recommend load equalizers for the 2003-2006 CBR 600RR instead.

By Custom LED | | 2003-2006 CBR-600RR Flasher Relay, 600RR | Read more

Stay in Touch

Call Us

We'd love to here from you. Call us at 201-477-0031 and we'll be happy to answer any questions you have.

Free Shipping!

Get Free Shipping (USA only) on all orders over $199! Use Discount Code: $200ShipsFree

Latest News

  • 2015-2023 Yamaha YZF-R1 Ultimate Stealth Plate Mounts!

      Custom LED is proud to announce the Ultimate Stealth Plate Mount for the 2015-2023 Yamaha YZF-R1.  This is a perfect compliment to our Blaster-X Tail Lights, or as a stand-alone fender eliminator kit.  This kit has provisions for optional... read more

  • 2016-2020 Kawasaki ZX-10R Blaster-X Integrated LED Tail Light Pre-Orders Open!

    Great News! We are now accepting orders for the 2016-2020 Kawasaki ZX-10R Blaster-X Integrated LED Tail Light! Please visit the product page for more information and to place your order .   read more

  • NEW! 2020 Yamaha MT-03 Blaster-X Tail Light

    Custom LED is pleased to announce our  Blaster-X tail light for the 2020 Yamaha MT-03!  This tail light is based on our highly acclaimed FZ-07 Blaster-X Tail Light, but with the proper turn signal connectors for the MT-03 read more